
Embed Use Cases
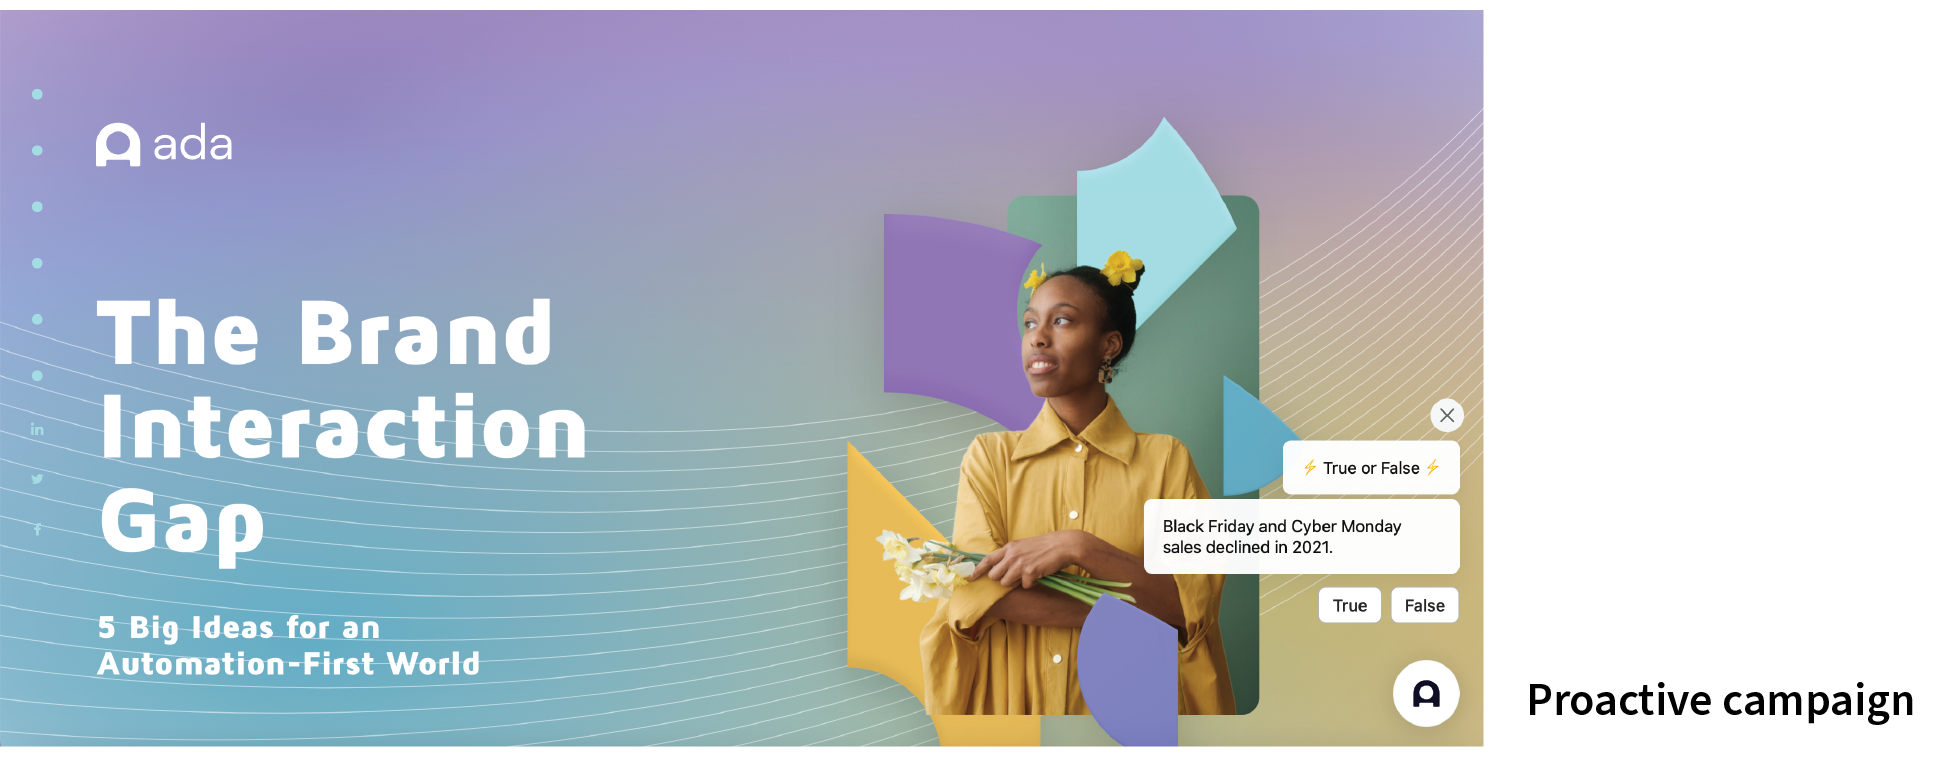
With the Ada Pro package, you can proactively target website visitors, providing bespoke support while automating conversations for your brand. By adding snippets of Embed2 code to your pages, you can launch messaging on your website and customize interactions based on visitor behavior.
The scenarios in this handbook represent just a few of the most common use cases to get you started.
This guide covers the steps required for both developers and bot builders to trigger different types of Advanced Proactive Campaigns. Note that you can set up and run Basic Proactive Campaigns through the dashboard.
Trigger Campaigns
To create and trigger campaigns from a webpage using any of the methods in this guide, you must:
- Be an Ada client with Ada Pro package, and an Ada bot Owner or Administrator account.
- Set up your bot and and follow the steps in the Embed2 quick start to enable Ada Web Chat, approve domains, and add a script to the page where you want to embed Ada. Proactive Web Campaigns require that your bot is deployed in a web browser, not a mobile app or other channel. (Note that you can take advantage of a separate feature – Proactive SMS Campaigns – to initiate text message based campaigns sent via SMS.)
- Create a Proactive Web Campaign designed around your specific goals. Campaign Content is the messaging for your campaign. Some of the scenarios below require that you set this content up in a certain way, and we’ll call out any specific instructions in each section.
The examples below place snippets of JavaScript directly on the page, but you can link to your code in a separate file if you prefer.
The scenarios that follow rely on the triggerCampaign action to launch a campaign created in the Ada dashboard (identified by a campaignKey). It supports two optional arguments:
- ignoreFrequency - when set to true, allows campaign triggering even if it's already been triggered within the frequency configured in the dashboard campaign settings
- ignoreStatus - when set to true, allows campaign triggering even if it's inactive or in a draft state
In most cases, you’ll want to set these to false, so that the original settings configured for the campaign take precedence. There may be specific cases in which you might enable ignoreFrequency. For example, a campaign that is shared across multiple pages, that you want to show once on a single page (such as the main page of a help center), but show once per session on all subpages.
Hover over a button or text
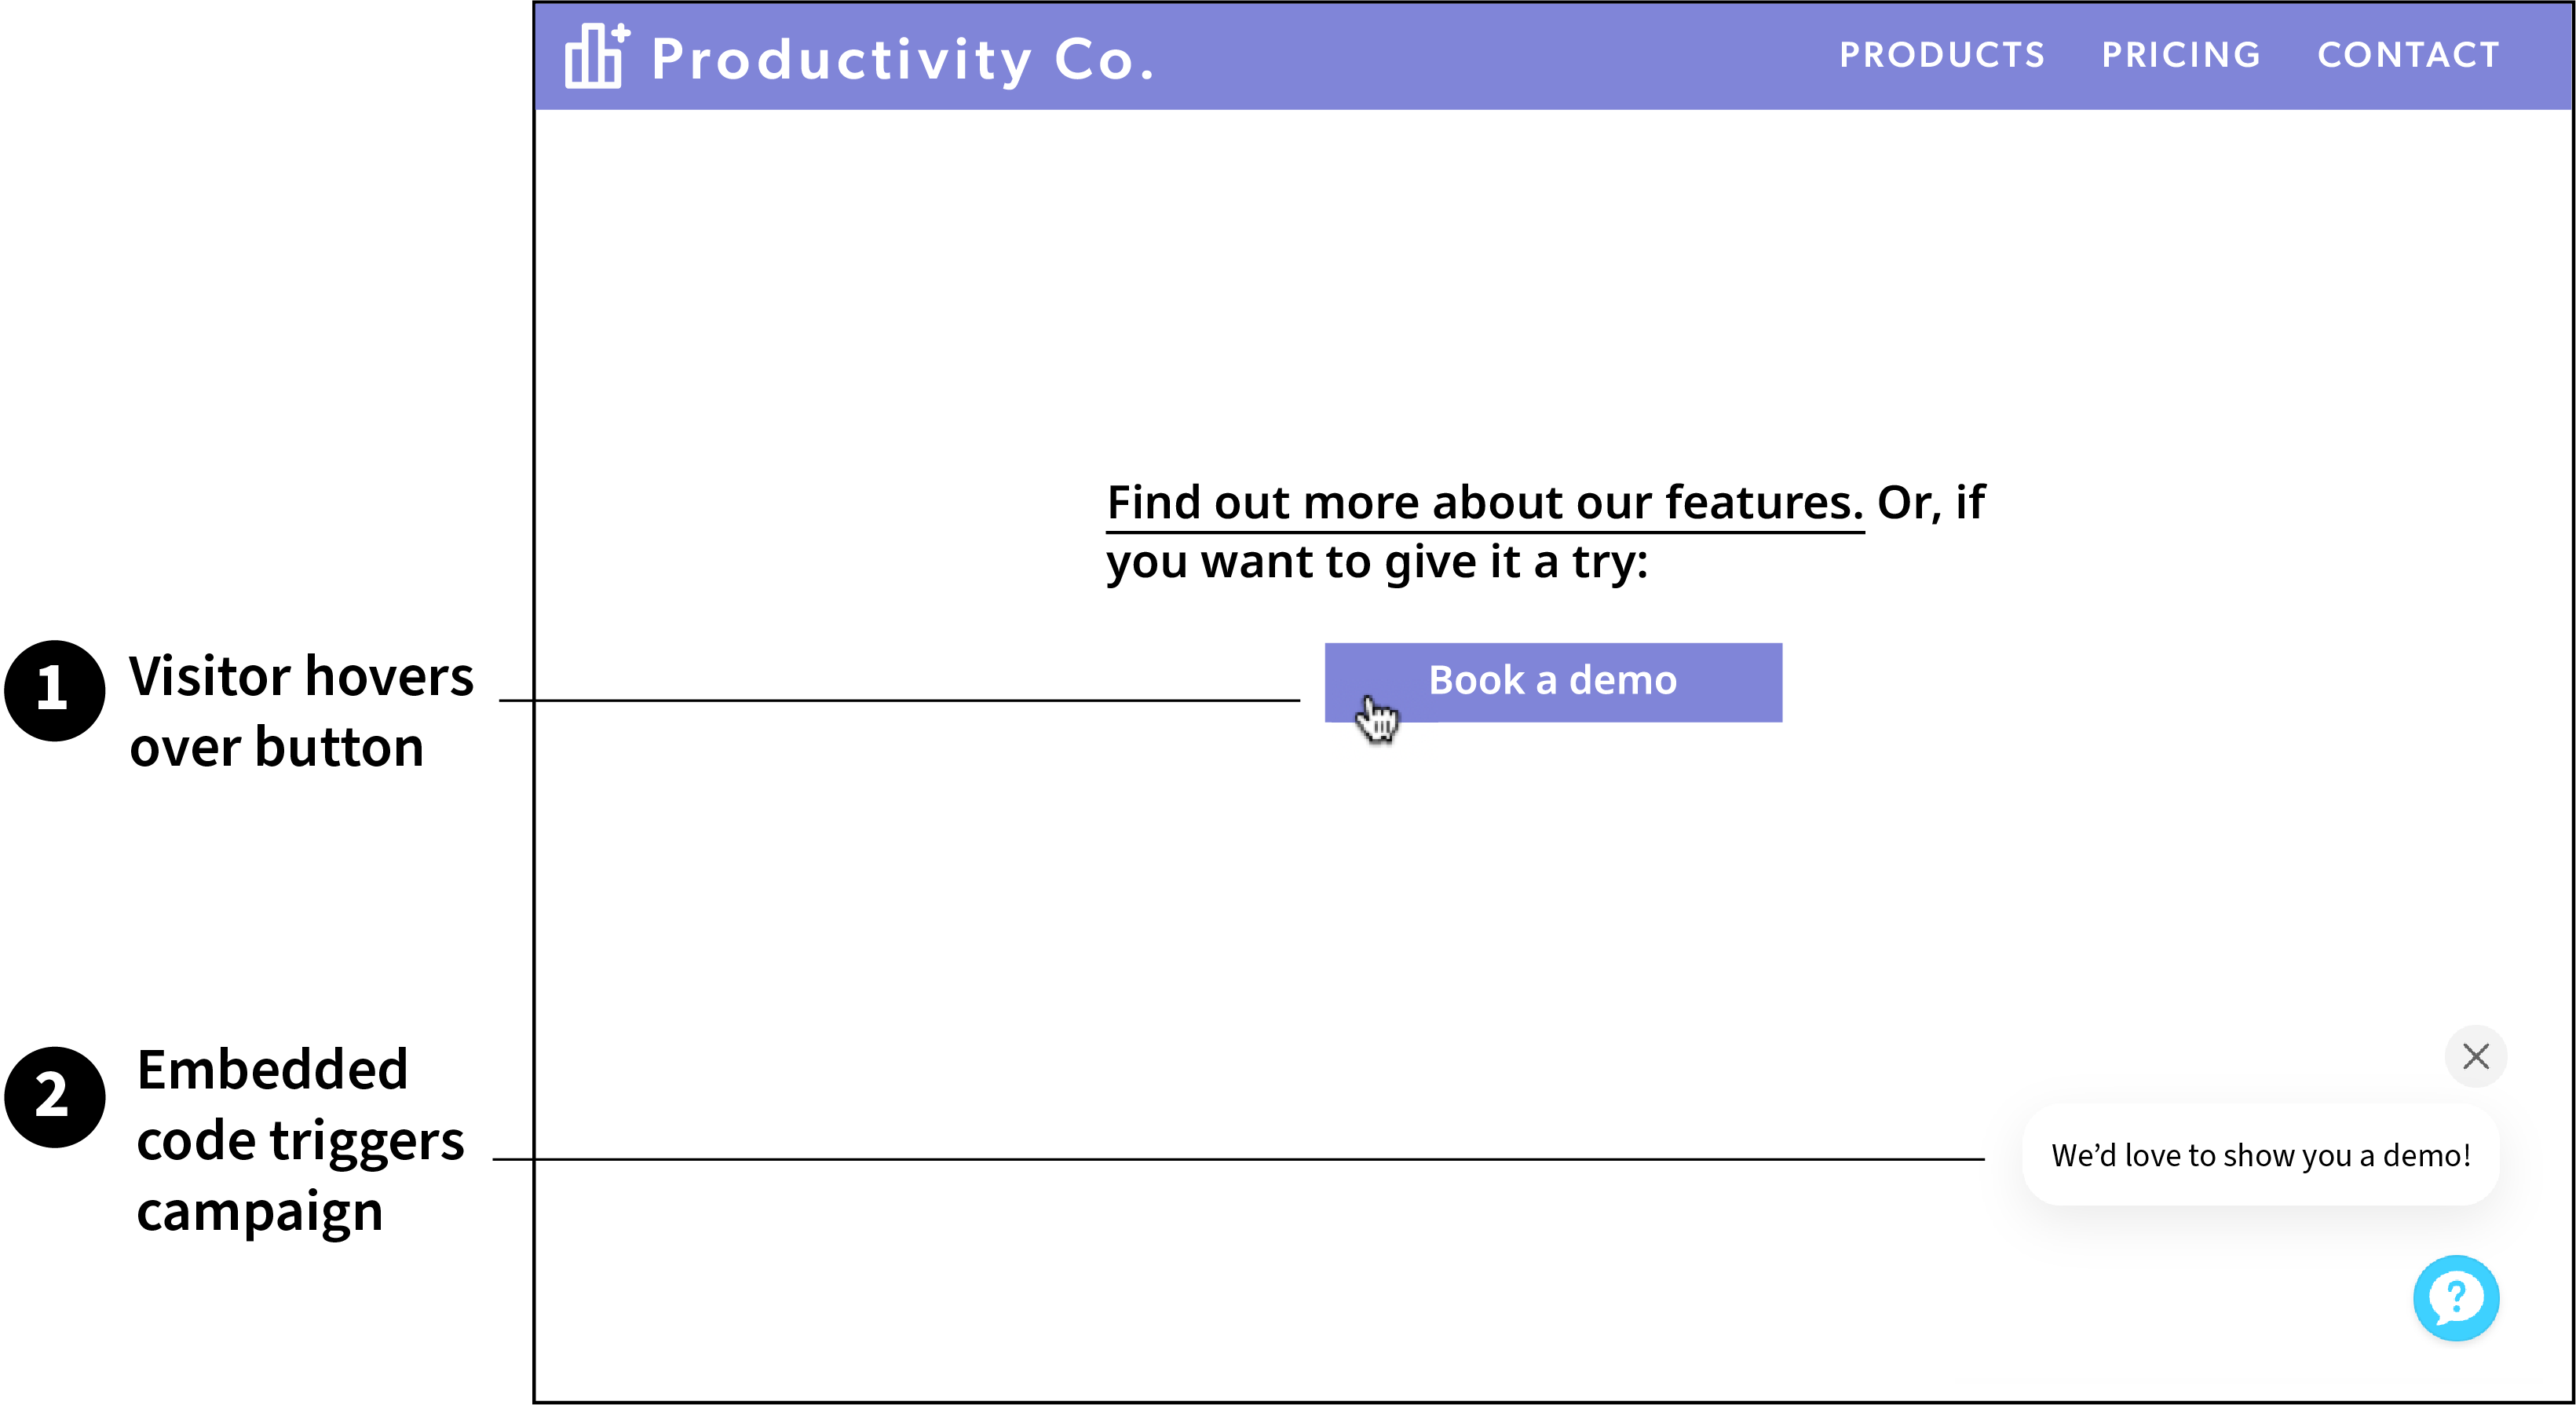
You can trigger a campaign whenever someone mouses over an element on your website. In our first example, hovering over a specific button to “Book a demo” prompts the initial chat content to pop up, encouraging them to register. See it in action.
Trigger on button hover
- On the page where you want to trigger the campaign, paste the following code, where:
hoverable-buttonis the id you’ll assign to the html buttonInvite_To_Demois your campaign key. Copy this from your Ada dashboard, under Build > Campaigns, in the Campaign Key column.
<script>
// only show the campaign a single time per page refresh

let campaignHasBeenShown = false;

document.getElementById("hoverable-button")
  .addEventListener("mouseenter", function(event) {
    if (campaignHasBeenShown) return;
    campaignHasBeenShown = true;
    window.adaEmbed.triggerCampaign("Invite_To_Demo", {
      ignoreStatus: false,
      ignoreFrequency: false
    })
  }, true);
</script>
- Create a button, or other html element. Give it an id matching the one in the document.getElementById function from the previous step, in this case, hoverable-button. Paste this in the
<body>of your html.
<button type="button" id="hoverable-button">Book a demo</button>
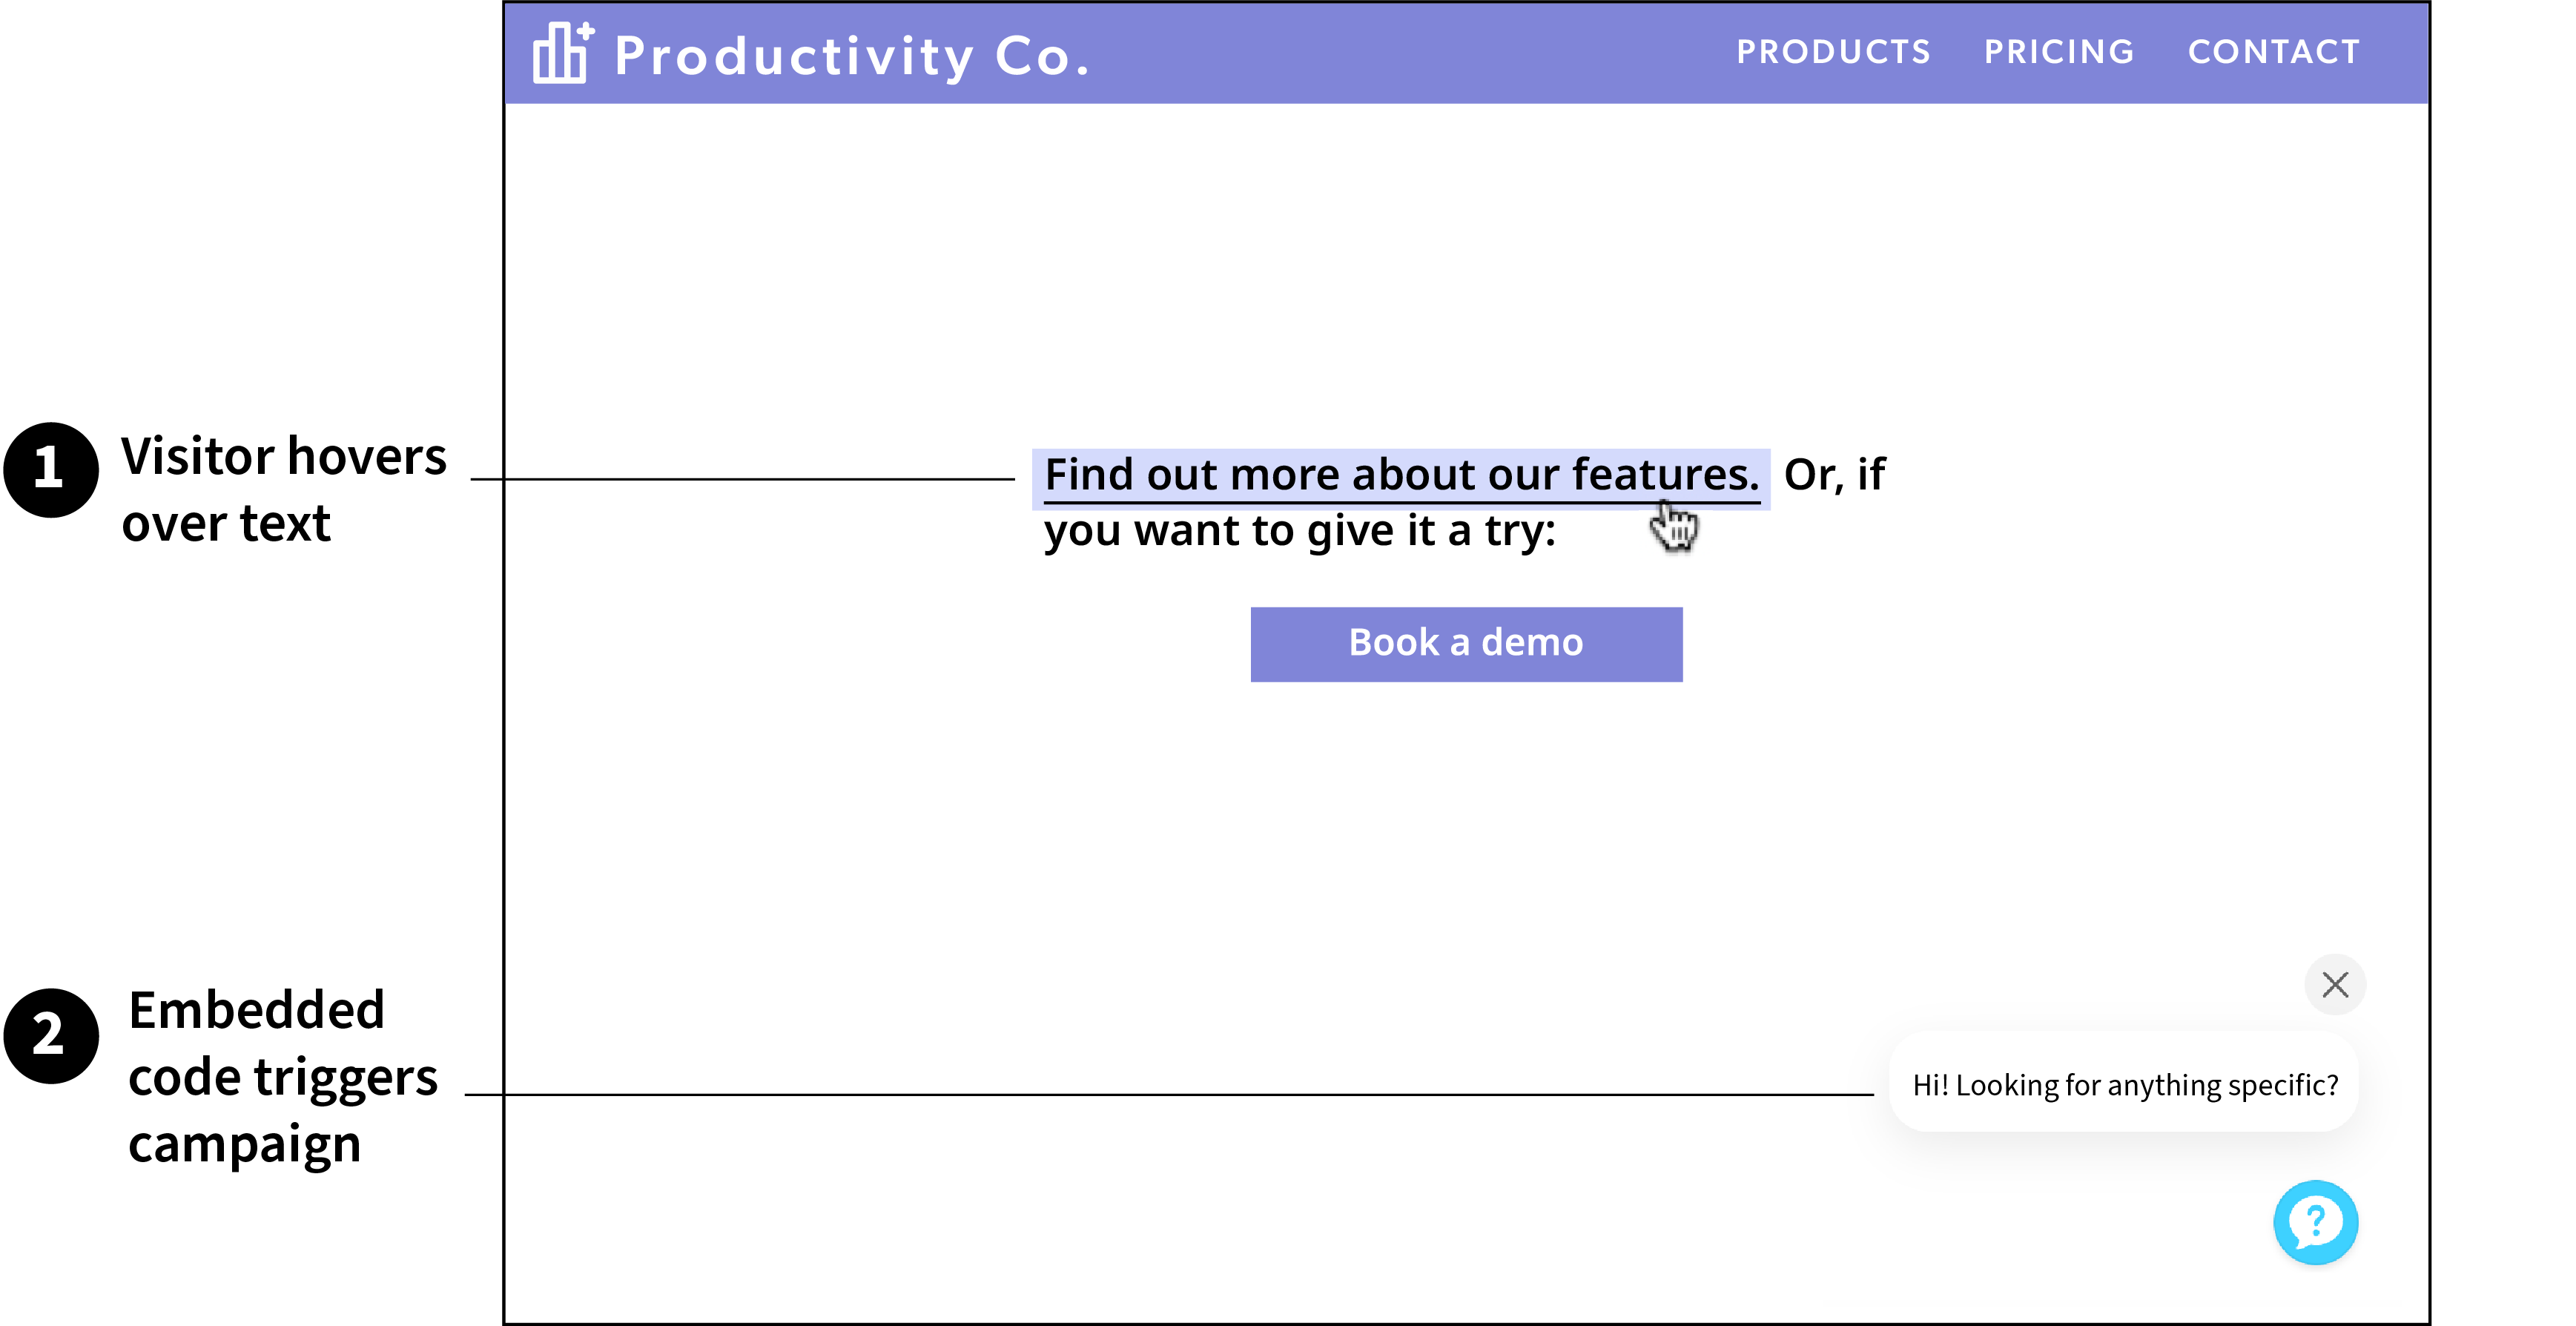
That’s it! You can use almost identical code and markup to trigger a campaign from any html element. For example, to trigger when someone hovers over text, as illustrated below, use the following procedure. See it in action.
Trigger on text hover
- On the page where you want to trigger the campaign, paste the following code, where:
hoverable-textis the id you’ll assign to the html button. You can name this id anything, it just needs to be the same in both the function and the html element.Feature_Setsis your campaign key. Copy this from your Ada dashboard, under Build > Campaigns, in the Campaign Key column.
<script>

// only show the campaign a single time per page refresh

document.getElementById("hoverable-text")
  .addEventListener("mouseenter", function(event) {
    window.adaEmbed.triggerCampaign("Feature_Sets", {
      ignoreStatus: false,
      ignoreFrequency: false
    })
  }, true);

</script>
- Add some text to the
<body>of your html, and give it the idhoverable-text. In this case, we used a paragraph, like so:
<p>
<a style="text-decoration: underline;" id="hoverable-text">Find out more about our features.</a>
Or, if you want to give it a try:
</p>
Click on any element
Any element on your webpage can become a way to engage potential customers. In this example, the visitor clicks a button to renew a subscription, which triggers an interaction tailored to that request. See it in action.

Trigger on click
- On the page where you want to trigger the campaign, paste the following code, where:
launchCampaignis the name of the function that you’ll call with the onclick event in an html element. You can give this function any name you choose.Renew_Subscriptionsis your campaign key. Copy this from your Ada dashboard, under Build > Campaigns, in the Campaign Key column.
<script>

  const launchCampaign = () => {
  window.adaEmbed.triggerCampaign("Renew_Subscriptions", {
    ignoreStatus: false,
    ignoreFrequency: false
  });
}

</script>
- Create an html element. Add the onclick event to the element, with a value matching the function from the previous step. Paste this in the
<body>of your html. In this example, the element is a button, and the function islaunchCampaign().
<button onclick="launchCampaign()">Renew my subscription</button>
Scroll through a page
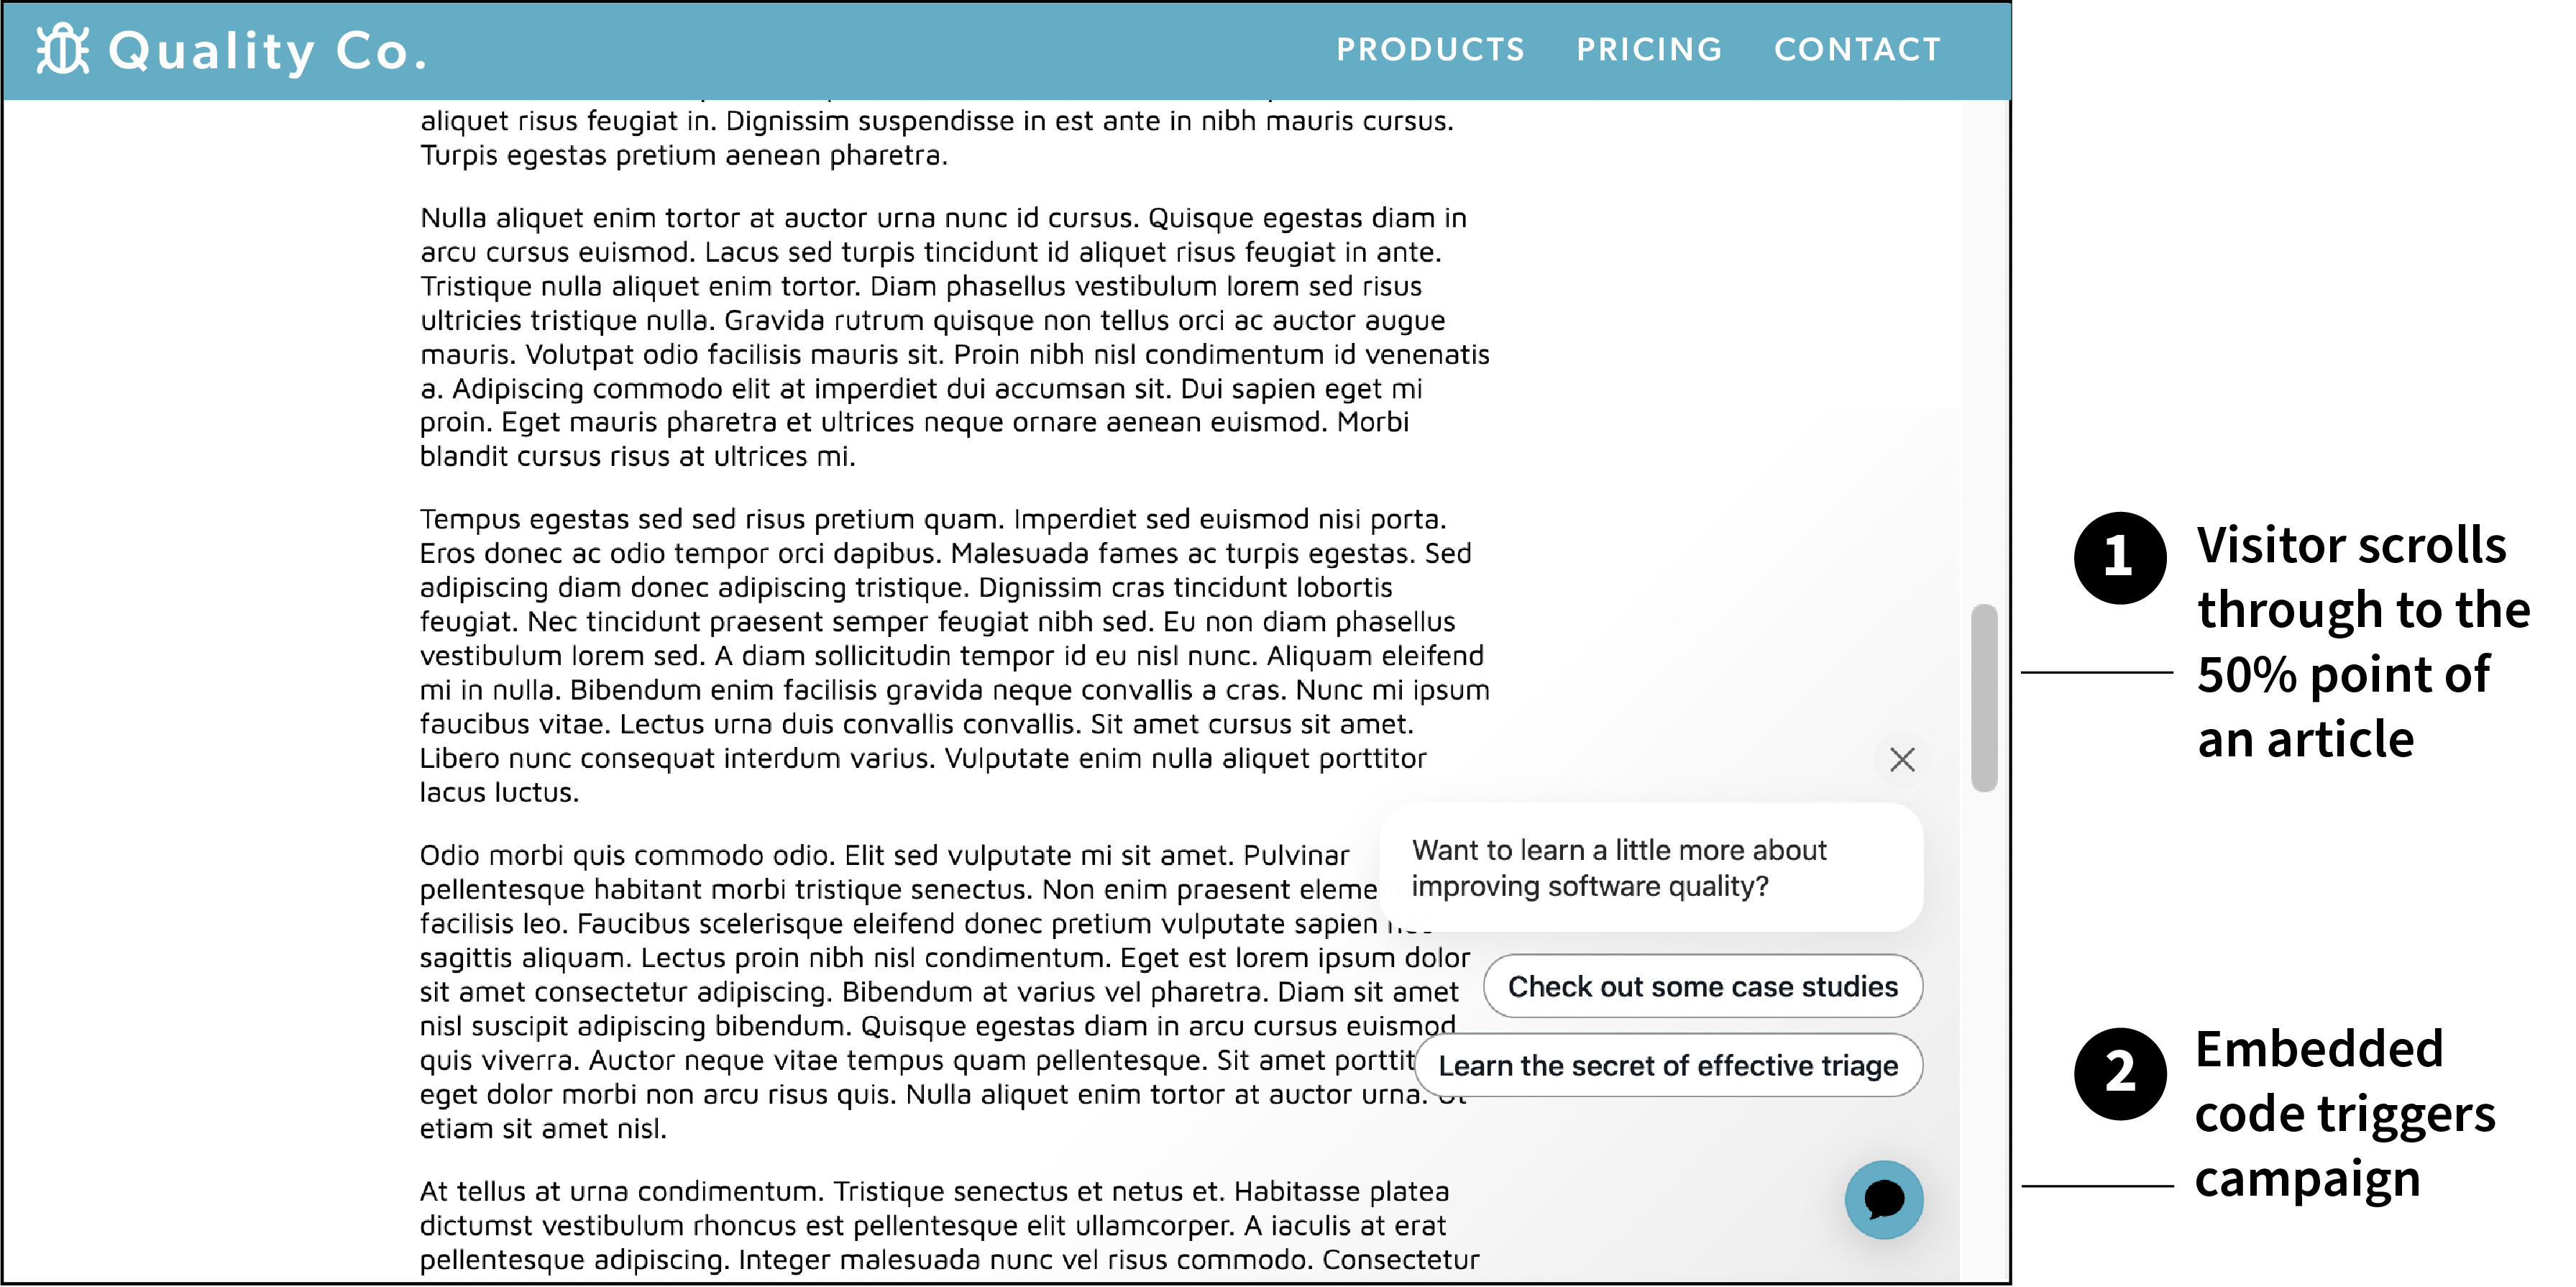
Launch a campaign when a visitor scrolls through a web page. You can set the trigger to correspond to any percentage of the page scrolled. See it in action.
Trigger on scroll
- On the page where you want to trigger the campaign, paste the following code, where:
/ 2expresses the amount of the page that must be scrolled before launching the campaign. In this example, the campaign launches when 50% of the page is scrolled, that is, thedocument.documentElement.scrollHeightdivided by 2. To change the amount of scrolling, change this number.Scroll_Based_Campaignis your campaign key. Copy this from your Ada dashboard, under Build > Campaigns, in the Campaign Key column.
Examples
<script>

// only show the campaign a single time per page refresh

let campaignHasBeenShown = false;

document
  .addEventListener("scroll", function(event) {
    if (campaignHasBeenShown) return;

    if (document.documentElement.clientHeight + document.documentElement.scrollTop > document.documentElement.scrollHeight / 2) {
      window.adaEmbed.triggerCampaign("Scroll_Based_Campaign", {
        ignoreStatus: false,
        ignoreFrequency: false
      })
      campaignHasBeenShown = true;
    }

  }, true);

</script>
To trigger the campaign closer to the top of the page, increase the number. For example, changing the number to 5 triggers the campaign once 20% of the page is scrolled.
document.documentElement.scrollHeight / 5
To trigger the campaign in the lower half of the page, use a number between 1 and 2. For example, changing the number to 1.1 triggers the campaign near the bottom.
document.documentElement.scrollHeight / 1.1
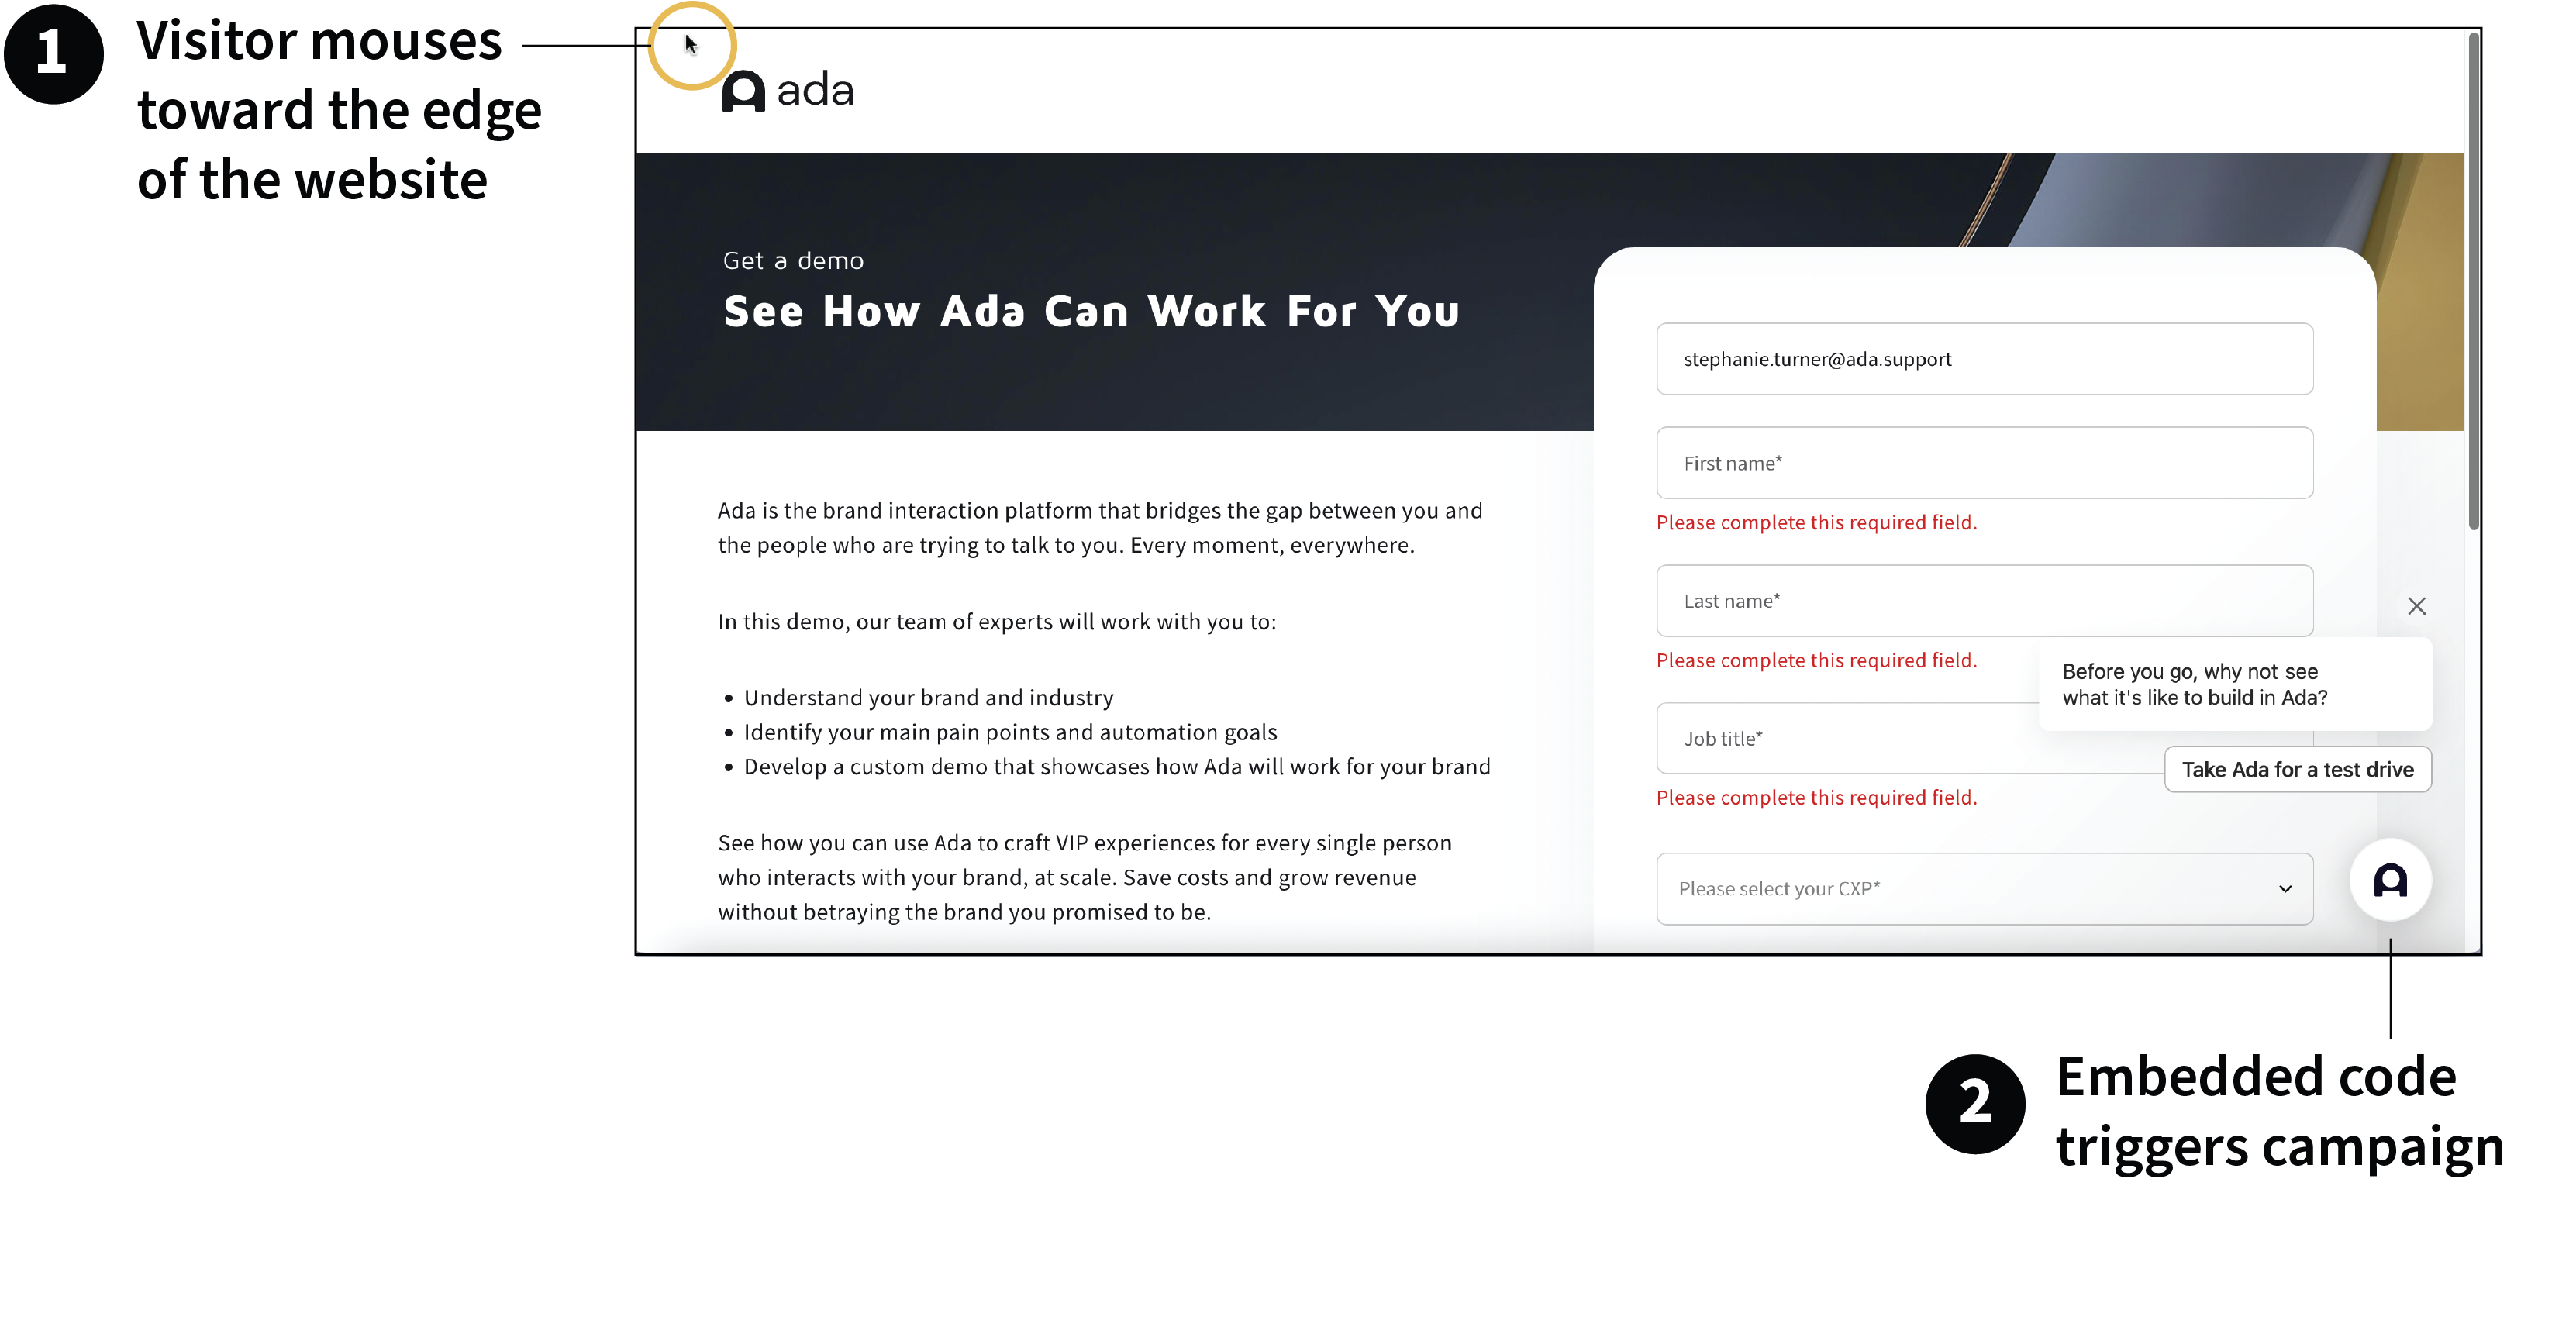
Signal exit intent
A visitor’s actions can telegraph an intention to leave your site. Use the code in the procedure below to trigger a campaign when the visitor’s mouse moves out of the web page body, with messaging that encourages them to stay. See it in action.
Trigger based on exit intent
- On the page where you want to trigger the campaign, paste the following code, where
Exit_Intentis the name of your campaign.
   <script nonce="YFs=">
        let proactive = false;

        const mouseTrap = (e) => {
          if (e.clientY <= 0) {
            proactive = true;
            window.adaEmbed.triggerCampaign("Exit_Intent");
            document.body.removeEventListener('mouseleave', mouseTrap);
          }
        }

        const mouseHunt = () => {
          if (!proactive) {
            document.body.addEventListener('mouseleave', mouseTrap);
          }
        }

        mouseHunt();
    </script>
The mouseleave event fires when the cursor moves out of the document body. You could attach the event to a specific area of the page by assigning an id to a particular element, then getting the element by id and making that a constant (mouseTrap in the example above).
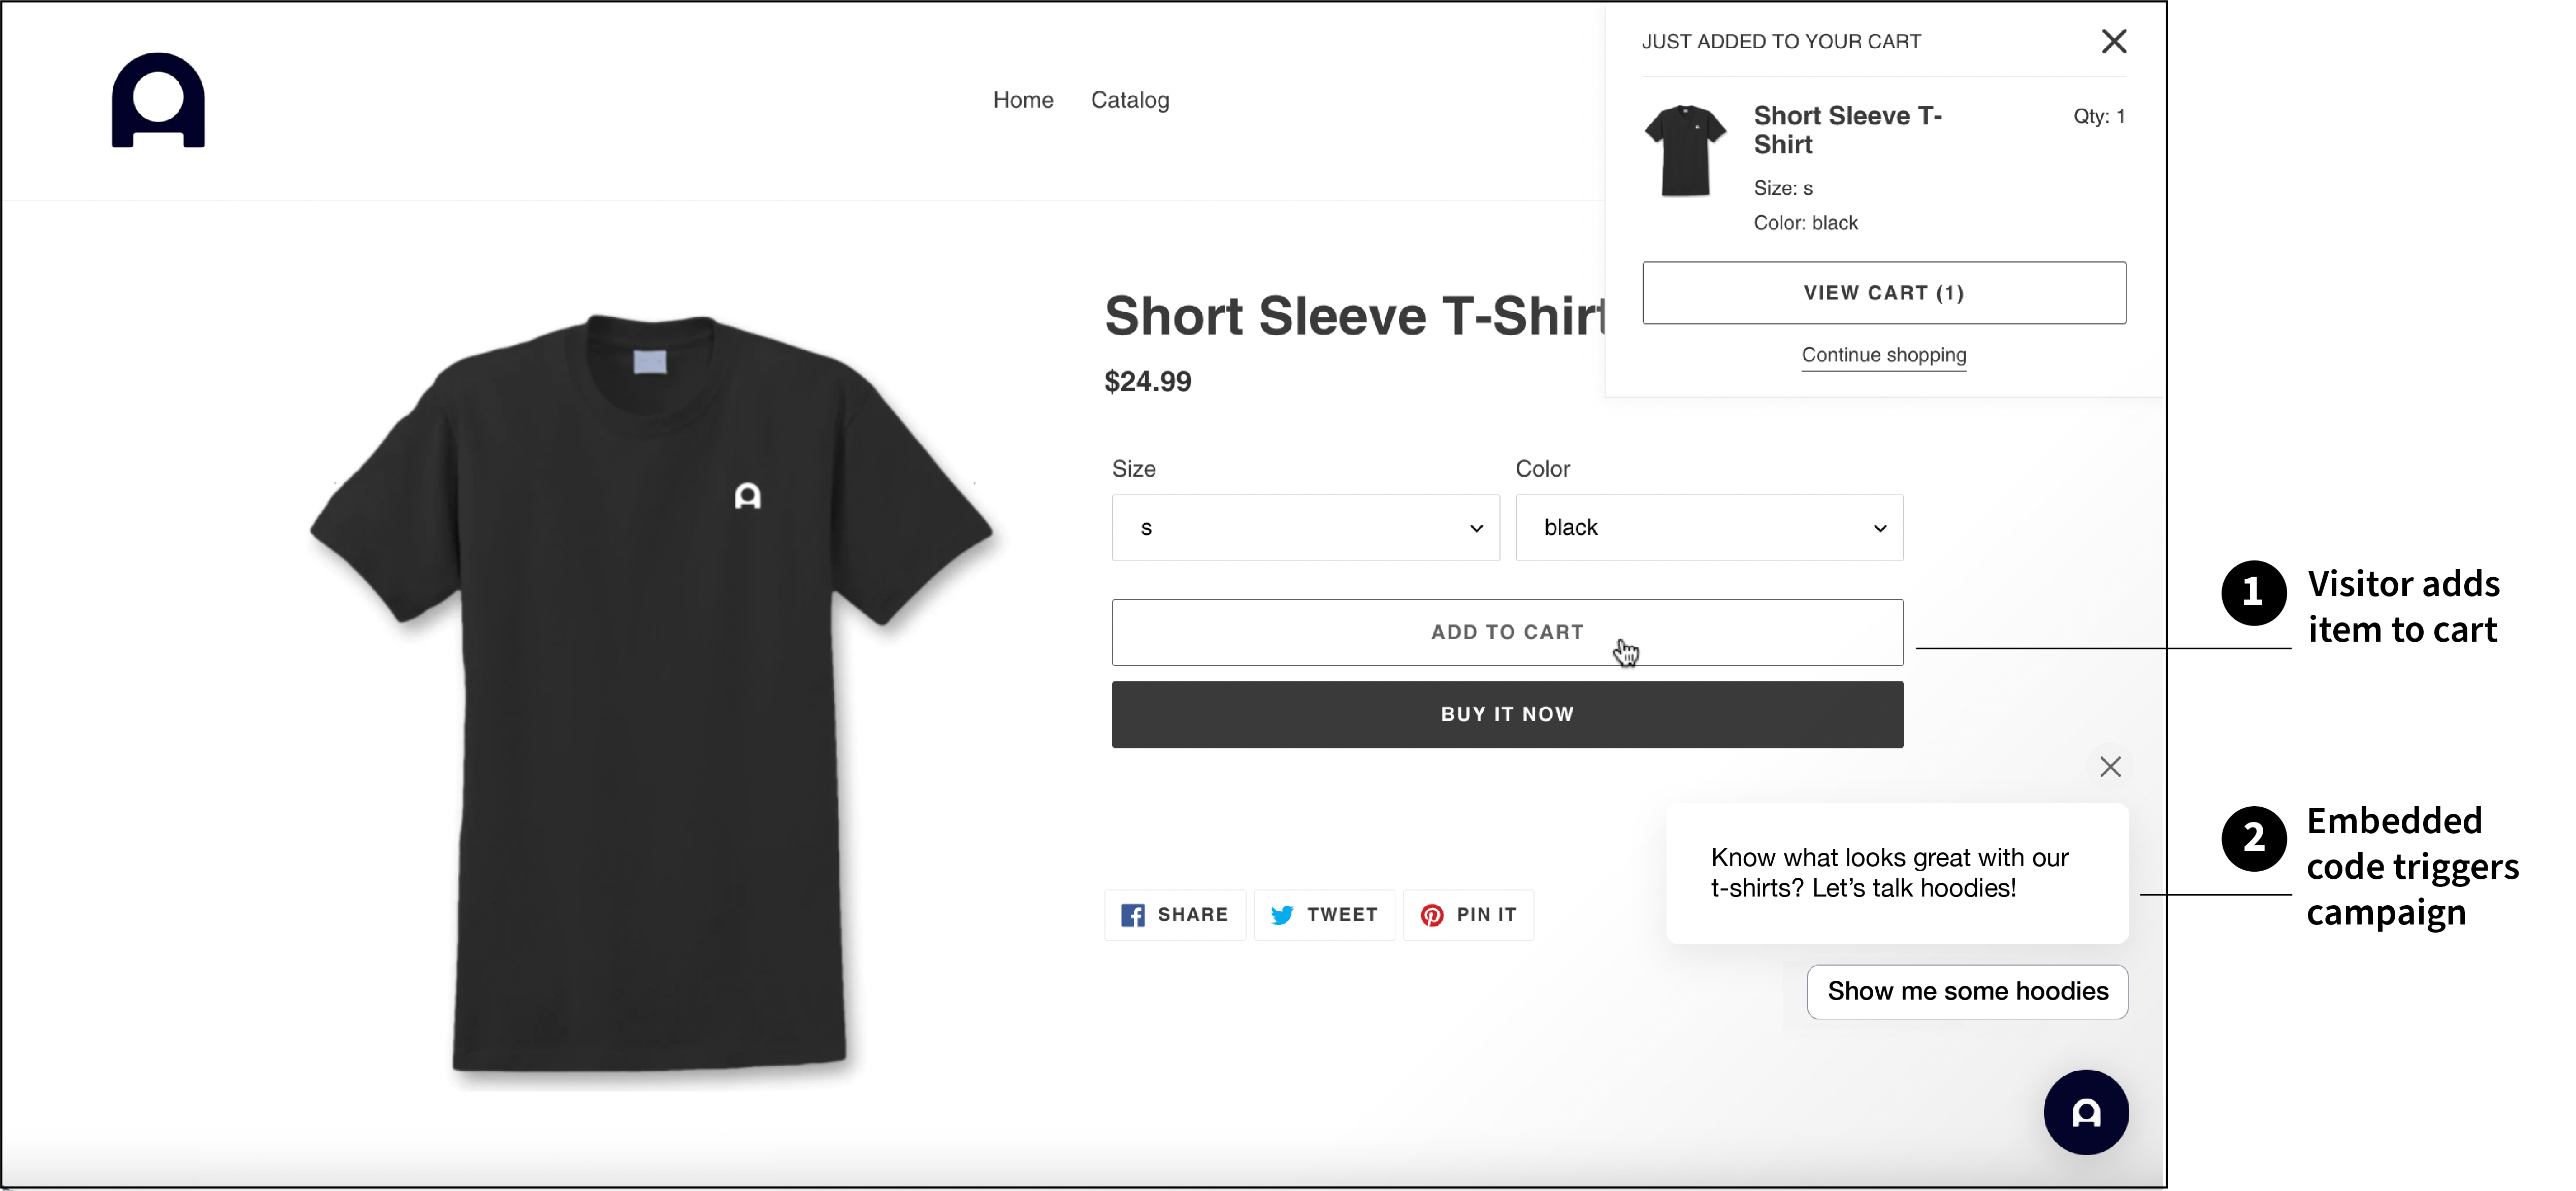
Add items to cart
When a visitor adds an item to a cart, it’s an opportunity to make recommendations. For example, you might suggest a related product, or let the customer know about a promotion on certain items. See this in action.
- Recommend an item after item added to cart launches a campaign with a product suggestion.
- Trigger a carousel after item added to cart is a way to recommend multiple additional items before the customer checks out.
You can use JavaScript event listeners to trigger a campaign when a customer adds an item to their cart. To demonstrate this, the examples below use a standard ‘click’ event, but you can tailor this code to use defined events from your ecommerce platform provider.
Recommend an item after item added to cart
- On the page where you want to trigger the campaign, paste the following code, replacing:
.btn.product-form\_\_cart-submitwith CSS selectors that correspond to the structure of elements on your site.Casual_Combowith your campaign key. Copy this from your Ada dashboard, under Build > Campaigns, in the Campaign Key column.
<script>
 document.querySelector(".btn.product-form\_\_cart-submit").addEventListener("click", () => {
  window.adaEmbed.triggerCampaign("Casual_Combo");
  });

</script>
- In the Answer for your Campaign Content, be sure to to include a product recommendation, whether through a Link block or a Quick Reply.
Trigger a carousel after item added to cart
- On the page where you want to trigger the campaign, paste the following code, replacing:
.btn.product-form\_\_cart-submitwith CSS selectors that correspond to the structure of elements on your site.Hoodie_Carouselwith your campaign key. Copy this from your Ada dashboard, under Build > Campaigns, in the Campaign Key column.
<script>
 document.querySelector(".btn.product-form__cart-submit").addEventListener("click", () => {
  window.adaEmbed.triggerCampaign("Hoodie_Carousel");
  });

</script>
- Create an Answer with a Carousel block. In the Answer for your Campaign Content, set this Carousel as a Quick Reply.
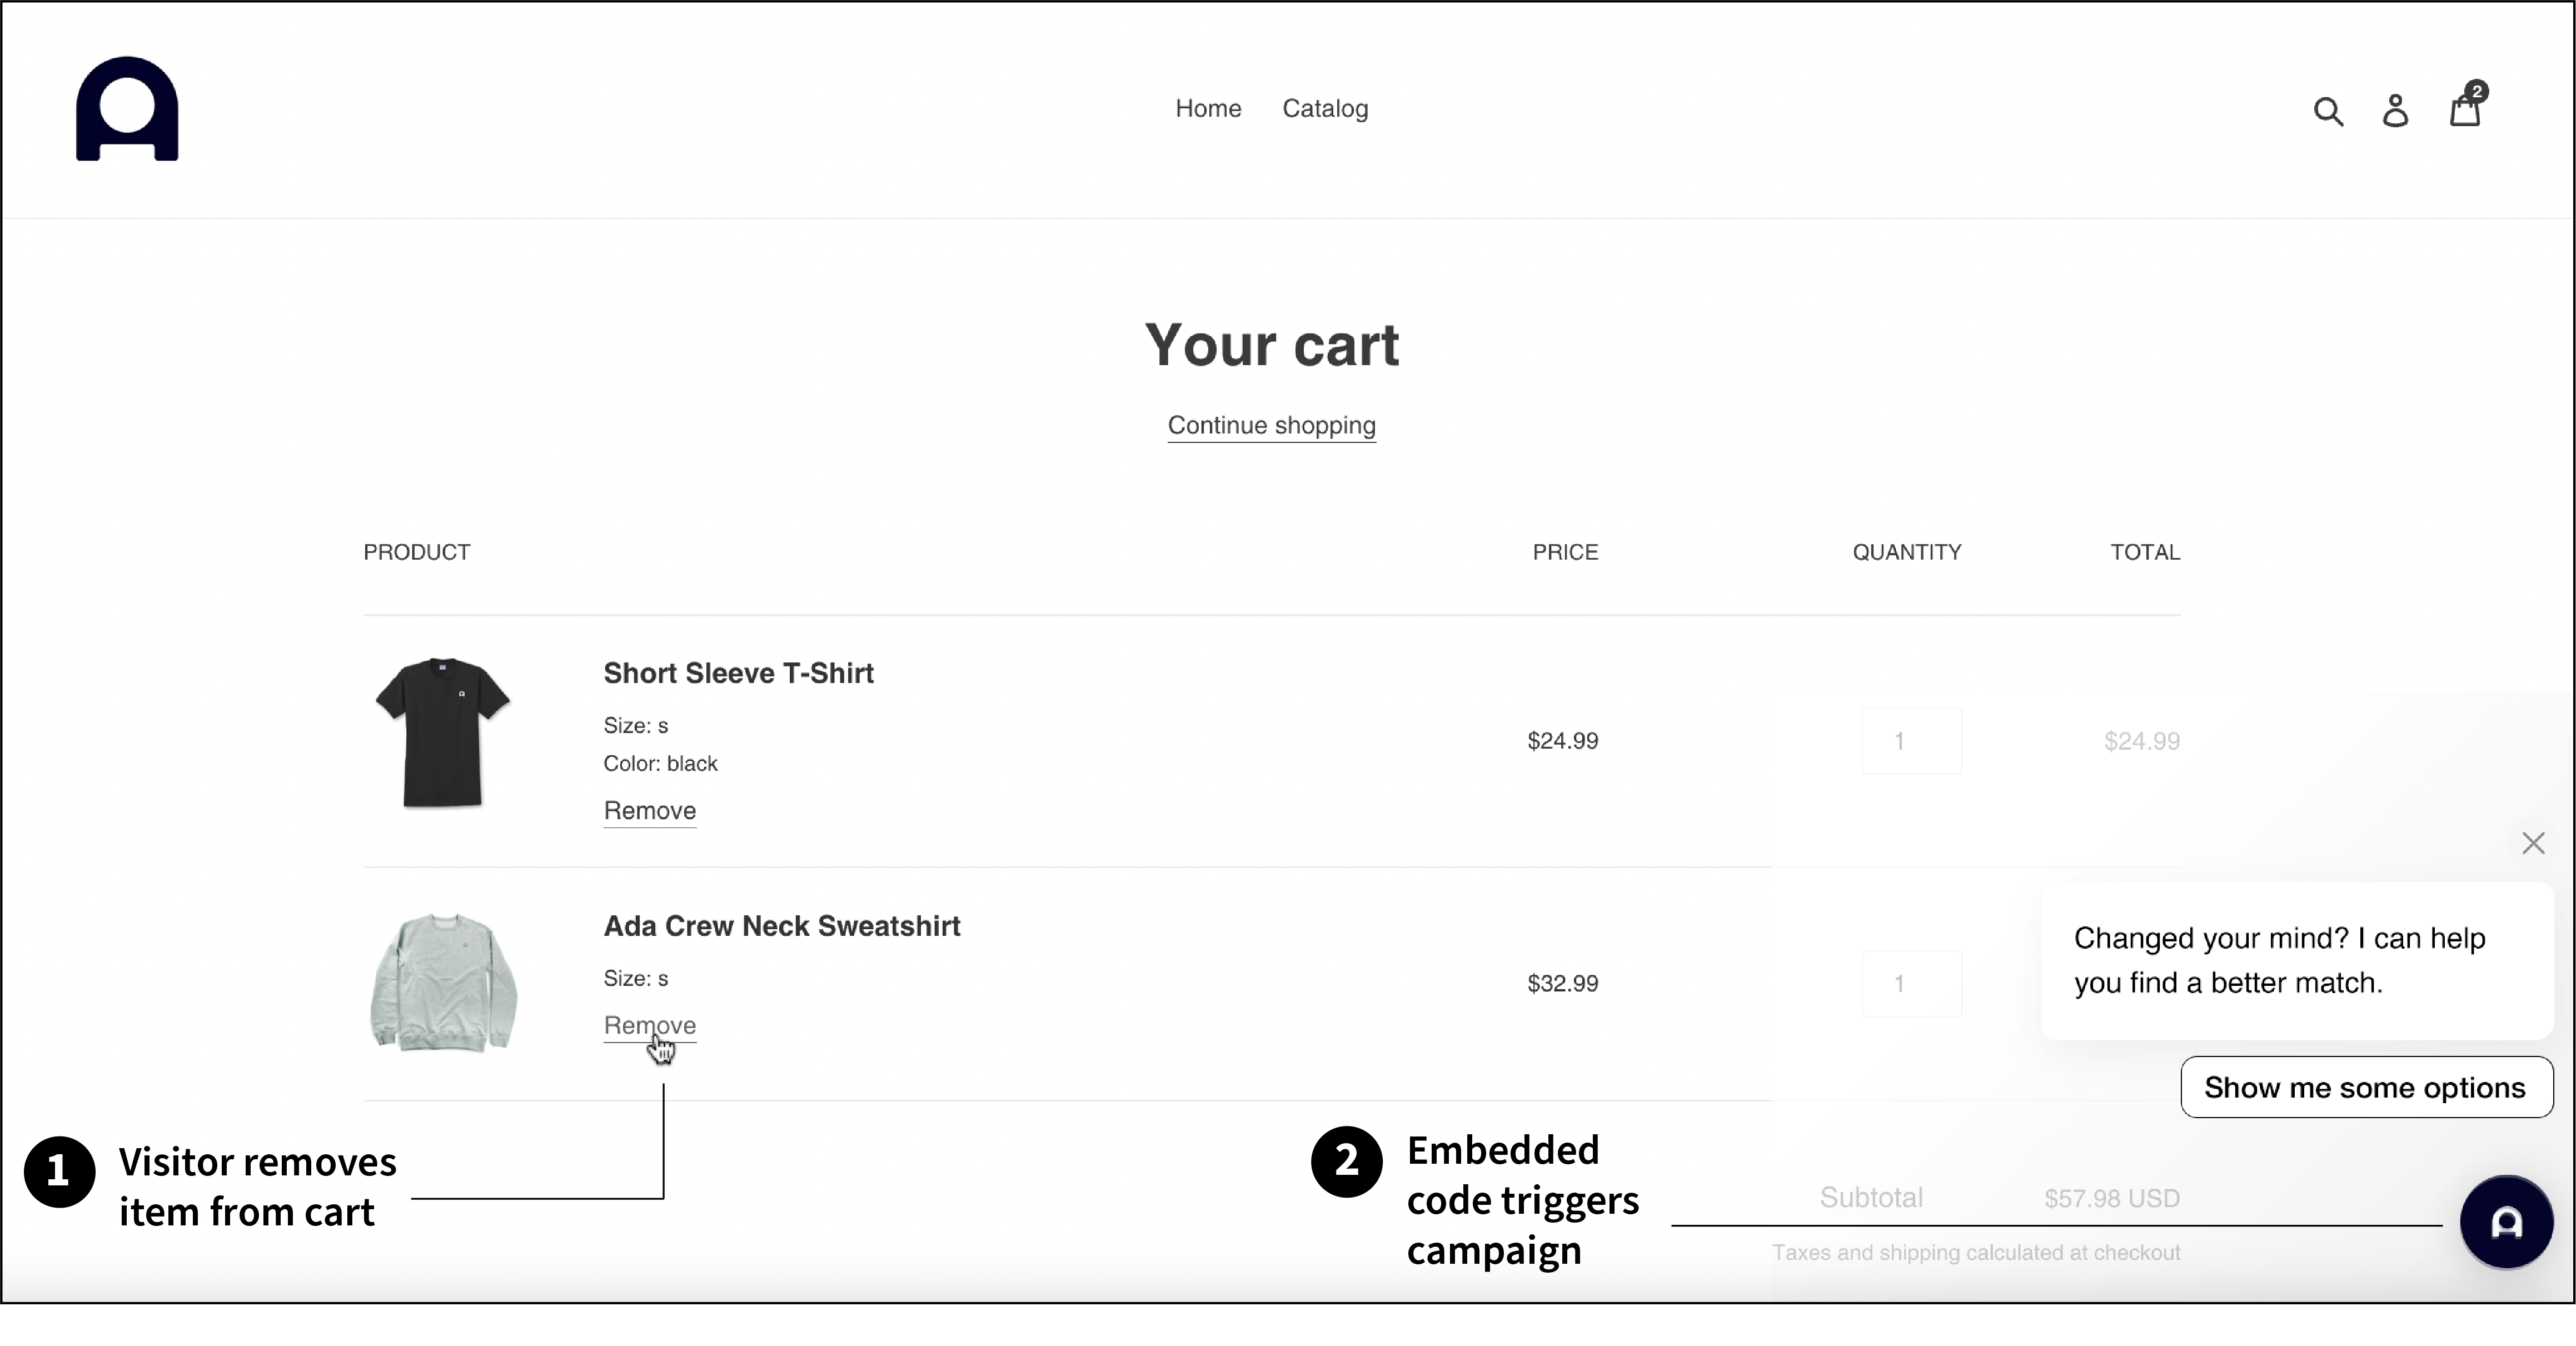
Remove items from a cart
When a visitor removes an item from a cart, you can trigger a campaign, gather information about what they're looking for, and suggest alternative items.
You can use JavaScript event listeners to trigger a campaign when a customer removes an item from their cart. To demonstrate this, the example below uses a standard ‘click’ event, but you can tailor this code to use defined events from your ecommerce platform provider.
Launch a campaign after an item is removed from cart
- On the page where you want to trigger the campaign, paste the following code, replacing:
.p.cart\_\_removewith CSS selectors that correspond to the structure of elements on your site.Better_Matchwith your campaign key. Copy this from your Ada dashboard, under Build > Campaigns, in the Campaign Key column.
<script>
 document.querySelector(".p.cart__remove").addEventListener("click", () => {
  window.adaEmbed.triggerCampaign("Better_Match");
  });
</script>
- In the Answer for your Campaign Content, be sure to to include a product recommendation, whether through a Link block or a Quick Reply.
Customize Campaigns based on metadata
Use the Embed2 setMetaFields action to launch campaigns that are even more finely tuned to your customer’s journey. The setMetaFields action passes stored information from your backend systems to Ada. You can then use this metadata as variables in your Campaign Content.
For example, you could use metaFields to:
- let a shopper know, based on the items in their cart, that they can get free shipping if they add items of a specific value
- trigger campaigns based on items or combinations of items in a cart, like an upsell recommending complementary items, or items of the same size
Since the setMetaFields action relies on external data (for example, from a shopping cart) you may need to make use of a third-party API to implement some solutions. However the example below is one you can adapt for all kinds of purposes, and it uses information gathered by Ada entirely from the example website.
Launch a free shipping upsell campaign after item added to cart
This example checks the total value of items in the cart, then tells the customer about a free shipping offer that kicks in once the order meets a certain threshold. See it in action.
Before you begin
Contact Ada to enable the Answer Utilities block.
- In the of the page where you want to trigger the campaign, paste the following code, where:
my-bot, is the name of your bot.Free_Shipping_Campaignis your campaign key. Copy this from your Ada dashboard, under Build > Campaigns, in the Campaign Key column.addToCartis a function that uses setMetaFields to set the total value of the cart (price), and store it ascartValue.
<script>

// Change these variables to test your own campaign
const handle = "my-bot";
const campaignName = "Free_Shipping_Campaign"

window.adaEmbed.start({
  handle,
});

// When you add something to your cart
const addToCart = async ({
  price
}) => {
	// in the campaign message, you have the ability to
  // use the cart size to calculate a customized message
  // for a user.
  await window.adaEmbed.setMetaFields({
    cartValue: price
  })

  window.adaEmbed.triggerCampaign(campaignName, {
    ignoreStatus: false,
    ignoreFrequency: false
  })
}
</script>
- Locate the “Add to cart” button (or its equivalent) on your web page. Add the
onclickevent to the element, with a value matching the function from the previous step (in this caseaddToCart). Include the dollar value of the item as the value of‘price’.
<button onclick="addToCart({ 'price': 6.50 })">Add to Cart</button>
Repeat for all the buttons on that page.
In order for the metavariable to show up in your bot dashboard, you must run the Embed script by clicking the button once.
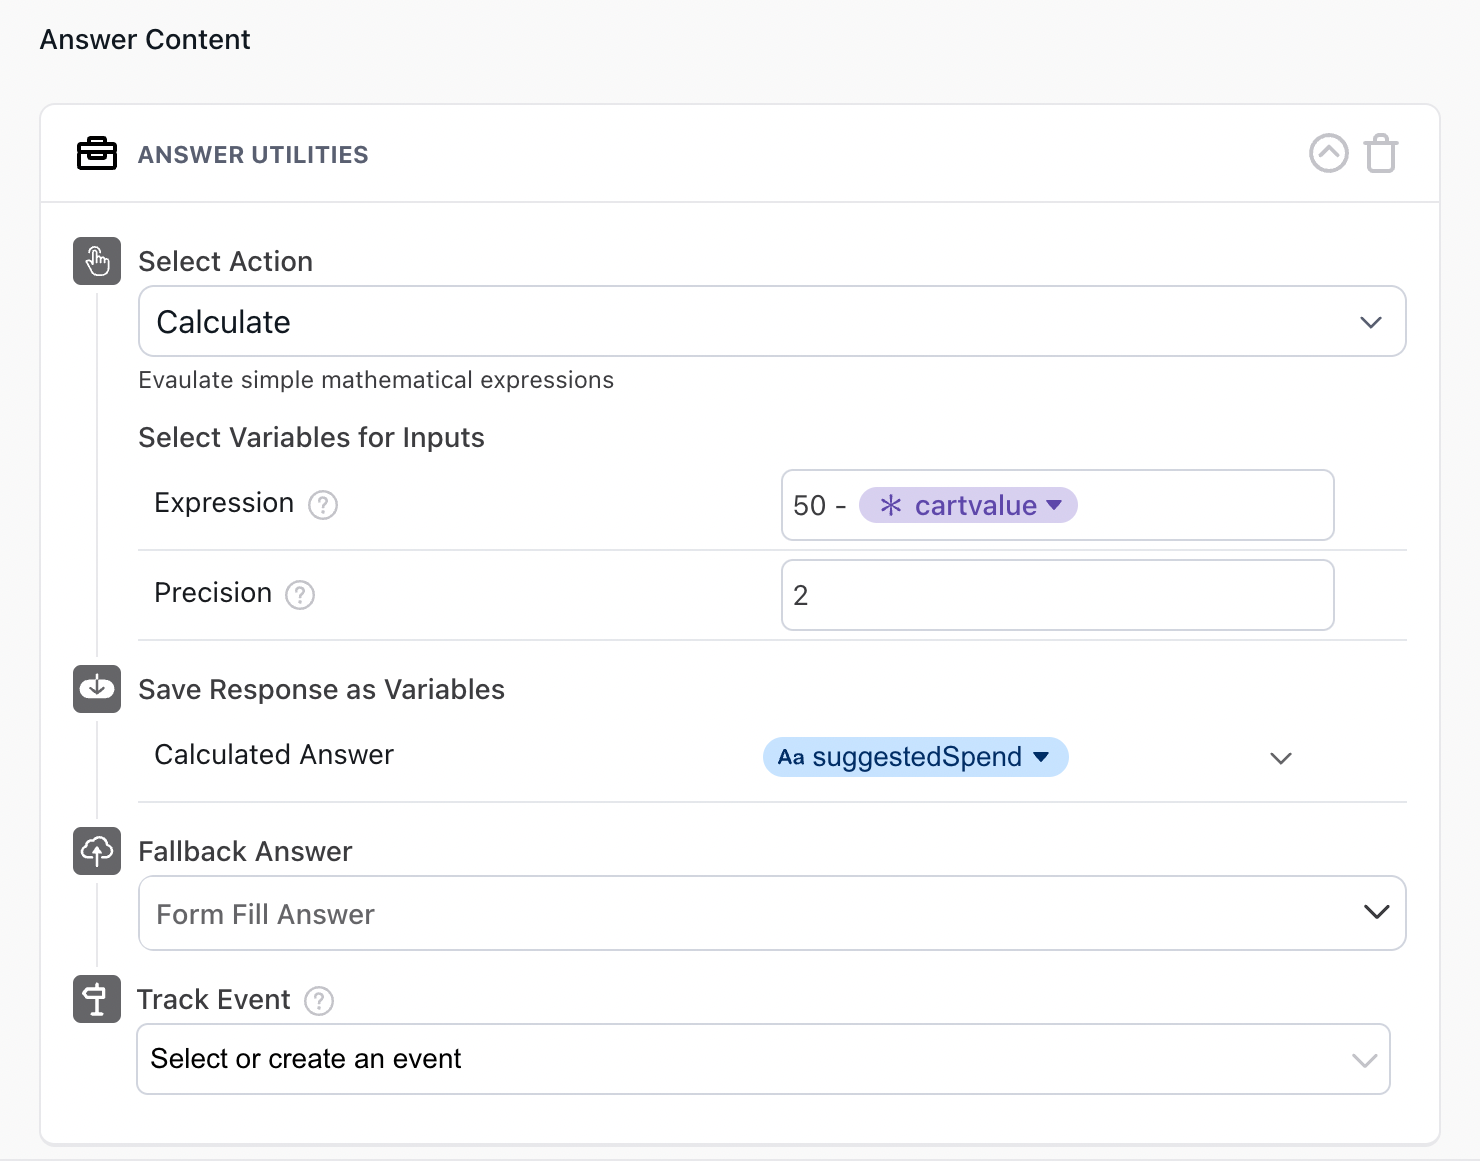
- In the Ada dashboard, create an Answer for your campaign and drag an Answer Utilities block into your Answer Content.
- Select Calculate as the Action. In the Expression field, subtract the
cartValuemetavariable from the amount required for free shipping. Create a variable (suggestedSpendin this example) in which to save the Calculated Answer.
Example
Developers are only needed to get the data into Ada; how you use this data within the bot dashboard is then up to the builder. For example, once you’ve set up the above, builders can change the threshold for free shipping at any time, without altering the original code.
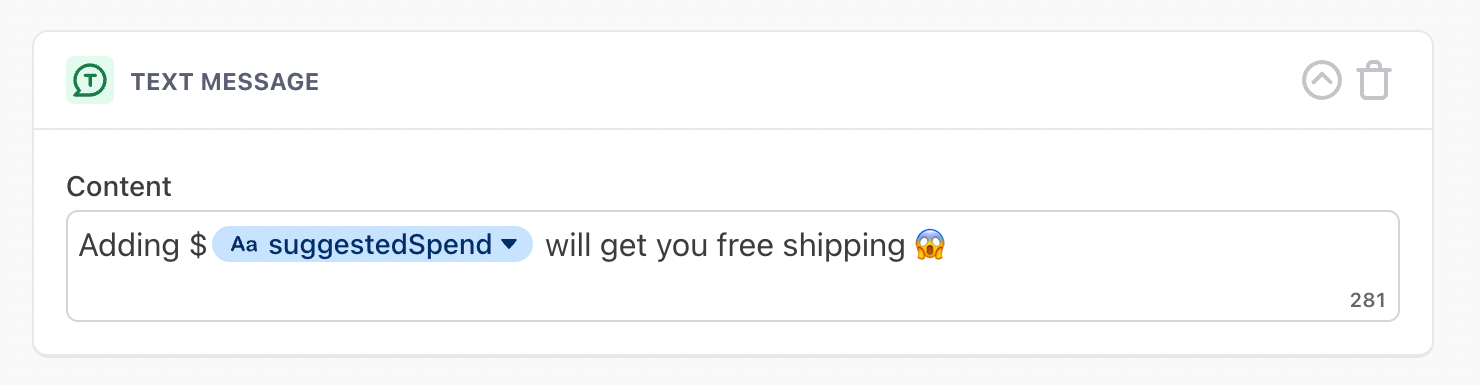
- Add a Text Message block just below this in the Answer. Type a message that uses the
suggestedSpendvariable to tell the customer how much more they need to spend to get the deal.
Example
- Wrap up your answer with a recommendation.
- Finally, in your campaign, use the answer you just created as the Campaign Content.
Learn more about setMetaFields
Track Campaign results using Events
Events can help you understand the impact of your Campaigns by tracking user actions on your website. For example, if you create a Campaign that triggers a carousel, you can use Events to get insights on whether recommendations led to clicks and cart adds.
View a carousel, then add an item to cart
This scenario produces two separate events, tracked in different ways:
- When the carousel is shown, it triggers a tracking event in an answer flow.
- When a visitor clicks an item in the carousel, an anchor in the URL acts as an identifier that can be tracked via code.
- When an item is added to cart, it’s tracked by an event placed in code on the web page.
Track carousel views and recommended items added to cart
- To track whether a Carousel was viewed, Create an event.
- Under Measure > Events, click New Event.
- Name the event. For example, “Viewed Carousel.”
- Create an Answer with a Carousel block.
- For each card in the Carousel, include a button with Link to External URL. Use the location of the item for sale, and append data to the URL to identify it. For example, you could use Urchin Tracking Module (UTM) tags, or an anchor, as in
<https://myshop.com/hula-hoop#ada-carousel-product-recommendation>. - Directly under the Carousel block, drag a Track Event block. Set the Event to the one you created in Step 1 (“Viewed Carousel” in this example).
- For each card in the Carousel, include a button with Link to External URL. Use the location of the item for sale, and append data to the URL to identify it. For example, you could use Urchin Tracking Module (UTM) tags, or an anchor, as in
- Create a campaign that includes the Answer created in Step 2 as a Quick Reply.
- To help track whether a recommended item was added to cart, Create an event.
- Under Measure > Events, click New Event.
- Name the event “Add to Cart,” and make note of the event key.
- Give the event a monetary value. In this case, since we’re dealing with various items for sale, use a variable for the monetary value, for example “cart_value.”
- To track users who clicked on a recommendation, paste the following code on all pages:
<script>

if (window.location.hash.indexOf('ada-carousel-product-recommendation') != -1) {
  localStorage.setItem("ada-recommendation-carousel-clicked", true);
}

</script>
- Run the following code whenever a user adds something to their cart. For example, you might associate it with an “Add to Cart” button, or a “Quick Add” modal. Note that:
Add_to_Cartis the event key for the event created in Step 4.cart_valueis the variable you assigned to the monetary value for your event.
// Run this code when a user adds something to their cart

if (localStorage.getItem('ada-recommendation-carousel-clicked')) {
  window.adaEmbed.trackEvent("Add_to_Cart", cart_value);

// Remove tracking so that we only count the product directly after the carousel click

  localStorage.removeItem("ada-recommendation-carousel-clicked");
}
Track items in cart and successful checkouts
You can build on the preceding scenario, and track items in cart and successful checkouts using a URL condition. Identify a unique string that appears in the URL when customers add an item or complete checkout using your third-party ecommerce software, then use this as a URL Condition in the event.
For example, if the URL includes "checkout-confirmation," set the condition’s Contains setting to checkout-confirmation.
See Track Events using URL Conditions for complete instructions.
Updated almost 2 years ago